How to Build Shaker Cabinet Doors
How to Build Shaker Cabinet Doors
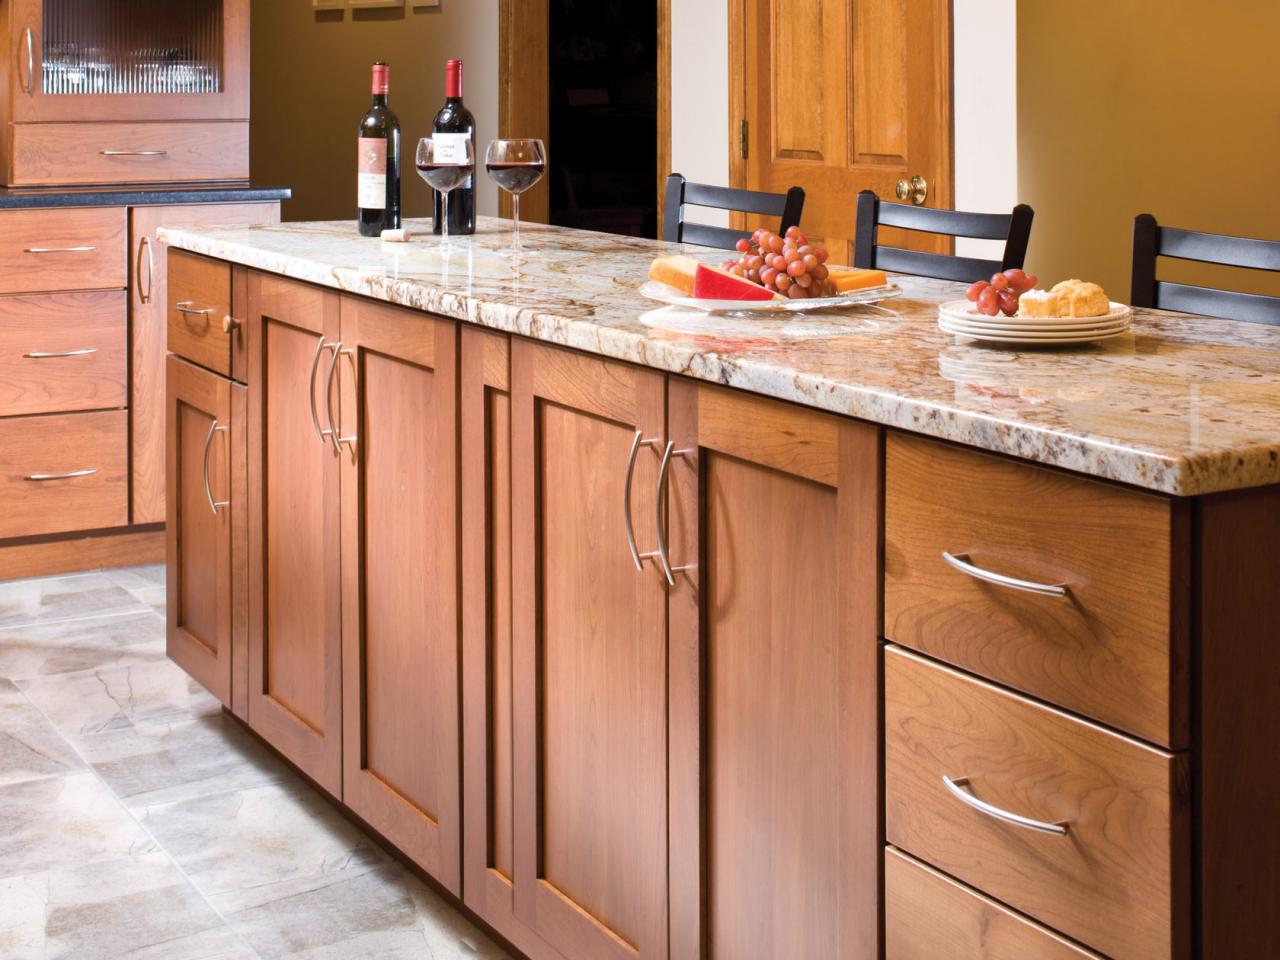
One of the most admired styles of cabinet doors is the shaker style door. Many cabinet makers and homeowners alike, respect the quality and functionality of the doors. The term ‘Shaker Cabinet’ refers to a sect of Quakers who called themselves Shakers. They are known for their fine cabinetry skills and furniture throughout the world.
The simplistic nature of a shaker cabinet offers depth and appeal to any kitchen. In addition, they are fairly easy to make. If you are looking to refresh your old flat cabinets you can transform your doors into a masterpiece by utilizing the shaker style.
A shaker cabinet door is basically a flat panel door that is framed with a raised border. You can build your own from scratch or update a flat cabinet door that you already have. Additionally, the border can be inset into the door frame or you can go with an overlay plan. In this case, we will cover how to build shaker cabinet doors using the overlay style.
Shaker Door Basics
You have two options for your door. Use a preexisting flat panel or purchase the lumber needed for a new panel. With new lumber, you’ll need to measure and cut the panels. Sizes will vary based on your kitchen. Size is also determined by how much space you want between the doors when they lay closed.
We suggest using your current cabinet doors for a template. This will alleviate extra measuring. If you are using your current doors for this project, simply remove them and prep them for the next step. If you are using new wood, take measurements of the current cabinets and cut your new doors based on those numbers.

The Frame
Next, you’ll prepare the framed edge. Shaker doors have a plain raised edge which is made up of two stiles and two rails. The stiles run vertically, while the rails run horizontally. One technique uses a tongue and grove system to attach the frame, but for the purpose of this project, we will be fastening our frame to the face of the flat panel where it will lay on top of our door panel.
To make the frame:
- Determine the width of the border you would like. We suggest a 2-inch border around the door to achieve the classic shaker style door. The thickness will depend on your preferences, but plywood ½- ¾ inches thick is a common choice.
- Rip-cut (with the grain) your plywood to create the stiles. The stile is the vertical piece along the frame sides. Rip the plywood into strips 2 inches in width and then cross-cut (against the grain) each piece based on your measured cabinet length. You should measure each cabinet door before ripping your plywood just in case there are minor differences in measurements.
- The rails are created in a similar way to the stiles. The rails run horizontally across the top and bottom of your cabinet door. They fit within the stiles. Using your 2 inch ripped plywood, cut your rails based on the length measurement from the inner edge of the left stile to the inner edge of the right.
- Sand down the edges of your cut stiles and rails until they are smooth using a 220 grit sandpaper. Imperfections that can’t be sanded away can be filled with wood filler and then sanded smooth. Make sure to wipe off any extra sawdust once you are finished. Your primer and paint will take care of any other areas.

Putting it Together
You’ve prepped and sanded and are now ready to put it all together. You’ll work piece by piece as you work through the door panels. An air nailer gun or hammer can be used to assemble the frame pieces to your cabinet door. - Nail one stile to the left side of the cabinet. You can opt to add a thin layer of glue before you nail down the edges, but this may not be necessary for you. Use 3-4 nails down the length of the stile to fasten it to the door. One nail at the top and bottom and 1 or 2 evenly spaced between them. Follow the same process to attach the right stile.
- Lay the top rail between the attached stiles to ensure your measurements are correct. Sand down edges if it is not the right fit. You want a snug fit without forcing the rail into the space. A small gap can be fixed with putty, but larger gaps might be better off with a newly cut rail.
- Once the fit is right, you can nail the piece in. Align the top edge with that of the stiles. Add 3 nails; one on each end and one in the middle. Repeat the process for the bottom rail.
- Sand down any outside edges so they are aligned with the door and smooth. Use wood filler, or putty, to cover up the nail heads. Let the filler dry and then sand the entire door until it is smooth. Drill holes for your hardware and finally, wipe down the cabinets with a lint-free towel.

With your shaker cabinet doors built, you are now ready to prime and paint. When the paint has cured, add the hardware and accessories, and then hang your cabinets. By following these simple steps you’ll have created a sophisticated look for your kitchen that represents the cherished classic and quality finish of the shakers.
Great Pros is Here to Help
We have multiple handymen in your area who are readily available to help you with your project. It only takes 2 minutes to fill out a cabinet questionnaire, and you should receive responses very quickly! Great Pros is here to help you with all of your home projects.